Step-by-step: create a pressed flowers keepsake at home
Posted on 07/05/2026
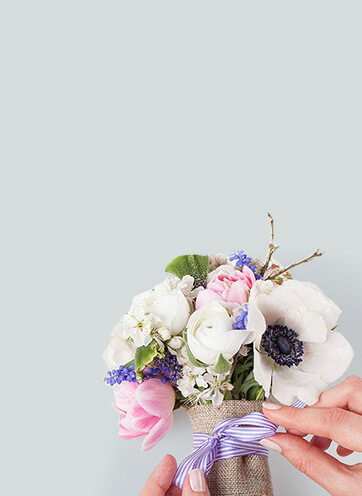
There's something quietly lovely about turning a bouquet into something you can keep. A pressed flowers keepsake at home is part craft project, part memory box, part small act of care. Maybe it's a bunch from an anniversary, a birthday, a wedding table, or flowers you were given "just because". Whatever the moment, pressing flowers lets you hold on to it in a form that lasts much longer than a vase on the windowsill.
If you've never made one before, don't worry. You do not need a fancy workshop or specialist tools. You just need the right flowers, a bit of patience, and a simple method that suits the blooms you have. In this guide, we'll walk through the whole process properly: choosing flowers, pressing them, drying them, arranging them, and finishing them so they look intentional rather than a bit scrappy. Truth be told, the difference is mostly in preparation.
We'll also cover common mistakes, practical tools, and a few sensible options depending on whether you want a framed display, a bookmark, a card insert, or a memory piece for a special occasion. And if the flowers came from a meaningful event, you may also find it useful to read a little about flower care guidance so the blooms stay in good condition long enough to press them well.
One small note before we start: the best keepsakes are usually the ones made slowly. Not perfect. Just thoughtful.
Why this keepsake matters
Pressed flowers work because they preserve more than colour. They preserve context. A stem from a wedding bouquet, a rose from a thank-you arrangement, or a few petals from a sympathy tribute can become a quiet physical reminder of a moment that mattered. That's why people return to this craft again and again: it's simple, but not shallow.
For many households, this is also a gentler way to make use of flowers that would otherwise fade away. If you've ordered blooms for an event, or received them from a loved one, keeping a piece of them can feel grounding. In a way, the process slows the moment down. You notice the petal shape, the scent, the colour shift as the blooms dry. It gives you a small pause, which is rare enough these days.
This matters especially when flowers are tied to life events: engagements, birthdays, Mother's Day, weddings, or times of remembrance. If you need flowers delivered for a meaningful occasion, it helps to choose a florist you can trust, and pages like delivery information and our guarantees can be useful when planning ahead. For occasions where sentiment carries extra weight, some readers also look at sympathy flower delivery details before deciding what to order.
Here's the emotional bit, if you like: a pressed flowers keepsake is one of those rare DIY projects that actually gets more meaningful with age. Not because it's expensive. Because it's yours.
How this keepsake works
At the simplest level, pressing flowers means removing moisture while keeping the flower's shape and colour as intact as possible. When moisture leaves the petals slowly and evenly, the bloom flattens without turning brown too quickly. That's the whole trick. Easy to say, slightly fiddly to do well.
The method you choose affects the final look. Heavier, fleshy flowers need more drying time and sometimes need to be split or trimmed first. Thin petals, grasses, and delicate blossoms usually press more cleanly. Some flowers hold their colour beautifully; others go a little muted or vintage-looking. That isn't failure. Often, it's part of the charm.
Most home crafters use one of three approaches:
- Book pressing for a simple, low-cost method
- Flower press kits for better consistency and pressure
- Microwave pressing for speed, though it needs more care
Whichever route you pick, the workflow is similar: choose fresh flowers, remove extra moisture, press them between absorbent layers, leave them undisturbed, then arrange them once fully dry. If you want to start with flowers that already have a strong shape and good structure, browse a broader range of flowers or seasonal options like summer blooms and autumn flowers.
Key benefits and practical advantages
Pressed flower keepsakes are popular for a reason. They're beautiful, but they're also practical. You can make them with very little equipment, and the finished piece can live in a frame, journal, card, or memory box without taking up much space.
- Affordable: most projects only need paper, a heavy book, and a frame.
- Personal: every piece reflects a specific bouquet or occasion.
- Low waste: it gives flowers a second life.
- Flexible: you can make cards, bookmarks, framed art, or gift inserts.
- Calming: the process is slow in a good way. A bit meditative, honestly.
There's also a subtle design advantage. Pressed flowers work in modern homes as easily as they work in cottage-style spaces. A neat arrangement of pink roses, little alstroemeria petals, or a few dried leaves can look elegant in a hallway, bedroom, or study. If you're choosing flowers with the end result in mind, it's worth thinking about colour first. Soft shades usually press more gracefully than very dark or very thick blooms. For inspiration, you might compare pink flowers, white flowers, or mixed-colour arrangements.
Who this is for and when it makes sense
This is ideal for anyone who wants to save flowers in a meaningful way without sending them off to a professional preservation service. It suits crafters, sentimental gift-givers, newlyweds, parents, grandparents, and anyone who keeps "important little things" tucked in drawers and boxes. You know the type. Lovely and slightly chaotic, but in a charming way.
It makes especially good sense when the flowers come from:
- a wedding bouquet or buttonhole
- a birthday bouquet
- Mother's Day or Valentine's flowers
- a new baby or christening arrangement
- a sympathy tribute or remembrance piece
- a thank-you, anniversary, or retirement gift
If the flowers are connected to a funeral or memorial, handle them gently and decide whether a keepsake feels emotionally right for everyone involved. For more practical support around memorial flowers and service arrangements, some readers also use funeral flowers, tributes, or letter tributes as a reference point before creating something personal at home.
It's not the best project for flowers that are already very wilted, damp, or bruised. If the petals are going translucent or collapsing, save what you can, but don't expect miracle results. Sometimes the honest answer is: use a fresher bloom next time.
Step-by-step guidance
1) Gather the right flowers
Start with fresh blooms that are clean and dry. Pick flowers that are not fully open if possible, because they tend to flatten better. Roses, daisies, pansies, violets, hydrangea petals, alstroemeria, and small sprigs often press well. Very chunky flowers can work too, but they usually need disassembly.
If you're choosing from an arrangement, the best candidates are the thinner petals, smaller blooms, and delicate stems. A mixed bouquet can be a blessing here, because you can separate out the easiest flowers and save the rest for another display. If you'd rather select flowers by occasion or colour before pressing them, a category like anniversary flowers or thinking of you flowers might help you plan a future keepsake-worthy bouquet.
2) Prep the blooms properly
Trim off excess stem and remove any damaged outer petals. If the flower head is bulky, split it in half so it can dry more evenly. Gently blot away surface moisture with tissue or kitchen paper. Don't soak them. That sounds obvious, but people do it. One damp flower can make the surrounding paper go patchy.
Also check for insects or pollen. Lilies, for example, can be messy because of their pollen. If you're using them, remove the stamens carefully before pressing. That small step saves a lot of irritation later.
3) Choose your pressing method
You can use a heavy book, a dedicated flower press, or a microwave press. For a beginner, a book is fine. Place the flower between absorbent sheets of plain paper, then tuck it inside the pages. Add more weight if needed. A flower press gives better pressure and airflow, which usually means a cleaner result. Microwave pressing is faster but easier to overdo.
For sentimental or seasonal flowers, slower is often better. If you're preserving blooms from a wedding day, for instance, a traditional press reduces the risk of scorching or warping.
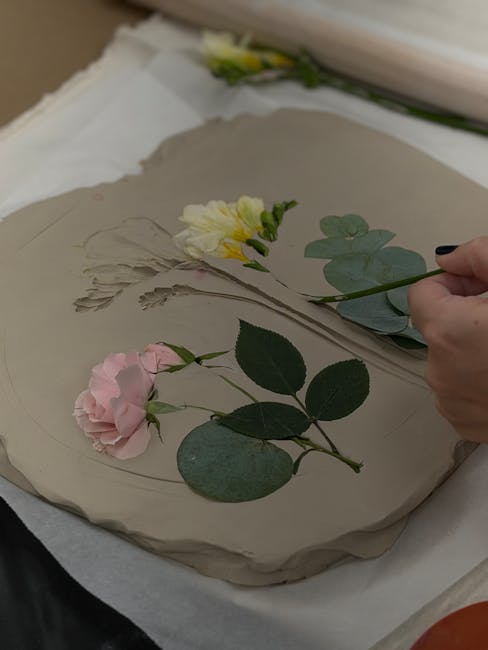
4) Arrange the flower layers
Lay flowers flat and separate any petals that overlap too much. Keep each bloom with enough space so the moisture can escape evenly. If you are pressing leaves too, place them with the veins spread naturally. Slightly curved lines can look prettier than stiff symmetry. Real flowers rarely behave like little paper cut-outs, and that's part of the appeal.
Use two sheets of absorbent paper around the blooms, then place them inside cardboard or inside the press if you're using one. If you're book pressing, sandwich the pages under a few more books or something solid. No wobbling, no sneaky movement.
5) Leave them alone for long enough
This is the hardest part for most people. You have to wait. Usually at least one to three weeks for thin flowers, and longer for thicker blooms. If you rush, the flowers may curl, go mouldy, or darken unevenly. If the paper feels damp, change it partway through. Fresh paper helps pull out moisture faster and keeps the colours cleaner.
Here's the honest truth: impatience ruins more flower keepsakes than any complicated technique ever will.
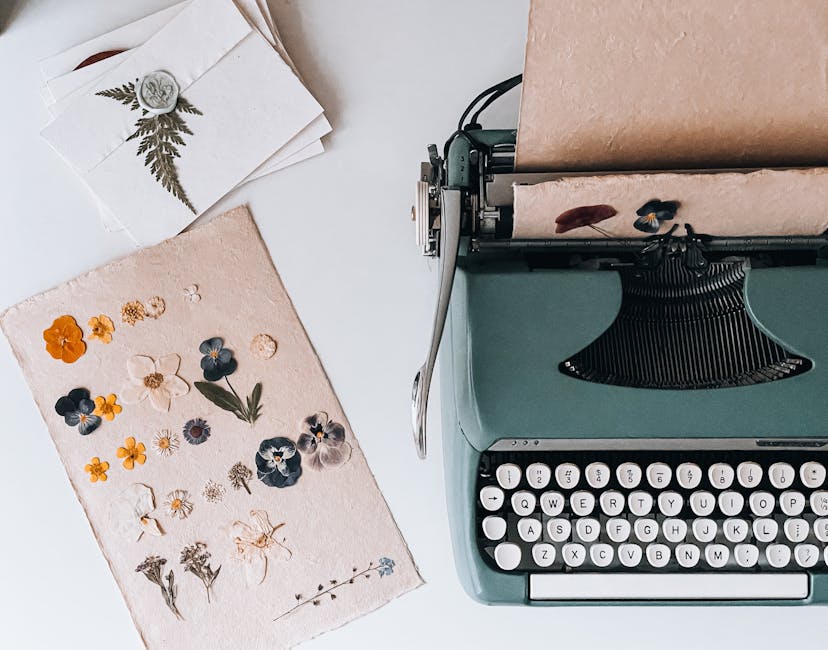
6) Check for dryness before using them
Once the flowers feel papery and brittle, they're ready. Gently lift one with tweezers or the corner of a card. If it still bends like a fresh petal, leave it longer. If it snaps too easily, that's fine for many projects, but handle it carefully. The texture should be dry throughout, not just on the outside.
7) Plan your layout before gluing
Before you stick anything down, arrange the flowers on your background surface. Try different placements. A loose diagonal arrangement often looks more elegant than a dense cluster. Sometimes one large bloom with a few smaller accents is all you need. Don't overfill it just because you can.
Use acid-free backing where possible, especially if the keepsake is meant to last. A neutral card, archival paper, or mount board will help preserve the colours better than cheap glossy stock. If you're creating something for a special event, a small note card or gift insert can also work nicely alongside anniversary cards, birthday cards, or congratulations cards.
8) Secure the flowers carefully
Use a very small amount of glue, or archival adhesive if you have it. Tweezers are helpful here. Press lightly and allow each piece to settle before adding the next. Too much glue can stain the petals or create a glossy patch that looks slightly off. A tiny dot is usually enough.
If you want a floaty effect, keep the stems and petals separate rather than flattening them all into a single shape. That creates depth, even in a flat design.
9) Frame or finish the keepsake
Once arranged, place the finished piece into a frame, resin piece, bookmark sleeve, or card mount. A shadow box can work well if you want a little more dimension. Make sure everything is fully dry before sealing it away. Trapped moisture is the enemy here. Honestly, it's the only really annoying part of the whole process.
If the keepsake is a gift, add a short handwritten note explaining where the flowers came from. That small detail often means more than the craft itself.
10) Store it in a sensible place
Keep the finished piece out of direct sunlight, away from radiators, and in a dry room. Sunlight fades pressed flowers faster than most people expect. A hallway with bright natural light can look beautiful, but if the frame sits in direct sun all day, the colours will wash out over time.
A bedroom shelf or shaded wall is usually safer. If you're making multiple pieces, label the back with the date and occasion. You'll thank yourself later.
Expert tips for better results
A few small choices will improve the final result more than any fancy tool ever will. In practice, the best pressed flower keepsakes usually come from careful flower selection and patient drying.
- Press flowers as soon as possible after receiving them.
- Use blotting paper or uncoated paper rather than shiny sheets.
- Change damp paper if the flowers are particularly juicy.
- Keep blooms flat and single-layered where possible.
- Choose flowers with clear edges so the silhouette stays pretty after pressing.
- Test adhesive on scrap paper first if you're making a formal frame.
If you're working with sentimental flowers from a wedding or memorial, take photos before you press them. That way, if the final arrangement is more abstract than expected, you still have the original bouquet saved digitally as well. Not the same thing, of course, but still useful.
Small timing tip: if you're making the keepsake in the evening, do the final layout the next morning. Fresh eyes help. A petal you thought was "carefree and artsy" at 10 p.m. can look slightly lopsided in daylight. Happens to everyone.
Common mistakes to avoid
Most poor results come from a handful of predictable issues. If you avoid these, your finished piece will look far more polished.
- Pressing flowers that are too wet and causing mould.
- Using flowers that are too thick without splitting them first.
- Rushing the drying stage and trapping moisture.
- Applying too much glue and staining the petals.
- Exposing the finished piece to direct sunlight.
- Choosing a background that competes with the flowers instead of supporting them.
Another common mistake is trying to preserve every flower from a bouquet in one composition. That usually creates a crowded, heavy look. Better to choose a few meaningful blooms and let them breathe. Less, in this case, really is more.
And one more thing: if a petal tears, don't panic. Sometimes a torn flower can be shifted into a more natural-looking position. Crafting is not an exam. A tiny flaw can be part of the charm.
Tools, resources and recommendations
You can make a lovely pressed flower keepsake with very basic tools. Here's the practical kit list most people need:
- fresh flowers
- plain absorbent paper or blotting paper
- a heavy book or flower press
- tweezers
- small scissors
- acid-free card or mount board
- archival glue or very small adhesive dots
- a frame, shadow box, bookmark base, or card mount
For supporting flowers and arrangements, browsing category pages can help you think ahead about colours and shapes. For example, roses, tulips, carnations, alstroemeria, and lilies all have different pressability and visual effects. For a fuller bouquet choice, look at best sellers or florist choice if you want a varied arrangement that still feels balanced.
If you're ordering flowers specifically for a keepsake project, it helps to know the florist's service promises and payment or refund arrangements before you buy. Pages like payment information, returns and refund policy, and contact details are useful for that. And if you're comparing bouquet styles for a future craft, a section such as bridal bouquets or bridesmaid bouquets can be a good place to spot shapes that press especially neatly.
Law, compliance, standards, or best practice
For a home craft project like this, there usually isn't much formal regulation to worry about. Still, a few best-practice points are worth keeping in mind, especially if you're gifting the keepsake, selling your work, or handling flowers from a sensitive occasion.
First, if the flowers came from someone else's bouquet, memorial tribute, or wedding arrangement, make sure you have permission before repurposing them. That sounds obvious, but with sentimental items it's easy to assume. Better to ask.
Second, if you're using commercial adhesives, resin, or sprays, follow the manufacturer's instructions. Work in a ventilated room and keep materials away from children and pets. Resin work in particular needs care. If you're not confident, a framed paper-based finish is simpler and safer.
Third, if you intend to sell pressed flower keepsakes, take proper account of consumer law, labelling, and product descriptions. Don't promise a colour result you can't guarantee, because flowers fade and vary. Be honest about natural differences. That is just good practice, really.
Finally, if the keepsake is made from flowers connected to bereavement or remembrance, be respectful about how the item is displayed and described. The emotional value matters just as much as the physical object. For readers creating or sending flowers for memorial contexts, it can be helpful to review sensitive service pages such as about us and guarantees before deciding on any related purchase.
Options, methods, or comparison table
There isn't one "best" way to make a pressed flowers keepsake at home. It depends on how much time you have, how delicate the flowers are, and how polished you want the final result to look.
| Method | Best for | Pros | Watch out for |
|---|---|---|---|
| Heavy book pressing | Beginners, low-cost projects | Easy, cheap, accessible | Slower, less even pressure |
| Flower press kit | Regular crafters, neat results | More consistent, reusable | Costs more than a book |
| Microwave pressing | Quick turnaround | Fast, convenient | Easy to scorch or over-dry |
| Shadow box arrangement | Dimensional keepsakes | Pretty, display-friendly | Bulkier, needs careful spacing |
| Flat frame or card mount | Simple gifts and decor | Clean, elegant, timeless | Needs very flat flowers |
For most people, a book press is the best place to start. If you enjoy the process and want cleaner results over time, move to a proper press. Microwave pressing is handy in a pinch, but I'd treat it like the faster kettle boil of the craft world: useful, yes, but not always the gentlest option.
Case study or real-world example
A common home project is to preserve a small bouquet from an anniversary dinner. Imagine a mixed arrangement with roses, a few sprigs of greenery, and some tiny accent flowers. Rather than pressing the whole bouquet, you choose one rose bloom, two smaller side flowers, and a couple of leaves. That keeps the final piece balanced and less crowded.
In one practical approach, the flowers are brought home the same evening and trimmed the next morning. The rose is split slightly at the base so it lies flatter. The leaves are pressed separately. After around two weeks in a book, the flowers are dry enough to handle. The final arrangement goes into a white mount card with a simple handwritten date and a narrow gold frame.
The result is not a perfect replica of the bouquet, and that's fine. It looks like a memory, not a catalogue image. That's usually what people want. Something tidy, personal, and quiet enough to sit on a shelf without shouting for attention.
A similar process works for wedding flowers, Mother's Day blooms, or a sympathy arrangement. For example, a white rose from a service spray can become a delicate remembrance piece, while a bright birthday bouquet can turn into a cheerful framed keepsake. If you're choosing future flowers with preserving in mind, pages such as weddings, Mother's Day, or sympathy flowers can help you think through the original arrangement style.
Practical checklist
Before you begin, run through this quick checklist. It saves time later, and honestly it saves a bit of frustration too.
- Have I chosen fresh flowers with low moisture?
- Have I removed damaged petals and excess stem?
- Do I have absorbent paper, a press or book, and tweezers?
- Is my workspace dry and flat?
- Have I decided on the final format: frame, card, bookmark, or shadow box?
- Have I allowed enough drying time?
- Is the backing acid-free where possible?
- Have I planned the layout before gluing?
- Will the finished piece be kept away from direct sunlight?
- Have I labelled the back with the date or occasion?
Quick summary: pick dry flowers, press them slowly, handle them gently, and finish them in a way that suits the memory attached to them. That's the heart of it. Everything else is detail.
Conclusion
Making a pressed flowers keepsake at home is one of those satisfying projects that feels both simple and meaningful. You don't need specialist training. You just need a decent flower, a clean workspace, and a little patience. The process is straightforward, but the result can carry a surprising amount of feeling.
Whether you're preserving a wedding bloom, saving a birthday rose, or turning a sympathy arrangement into something lasting, the key is to move slowly and choose materials carefully. That's how you end up with a keepsake that looks considered rather than improvised.
If you're planning to create several pieces or you'd like flowers chosen with colour and shape in mind, explore the supporting flower and service pages linked throughout this guide. They can help you choose blooms that press well and suit the occasion from the start.
Get a free quote today and see how much you can save.
Sometimes the smallest handmade things hold the biggest memories. A pressed petal in a frame can do that, quietly, for years.
Frequently Asked Questions
How long does it take to make a pressed flowers keepsake at home?
Most projects take one to three weeks for pressing, plus a bit of time for arranging and framing. Thicker flowers can take longer. If you rush the drying stage, the results usually suffer.
What flowers press best for beginners?
Flat or thin blooms usually work best: roses, daisies, pansies, violets, alstroemeria, and smaller petals. Flowers with thick centres or lots of moisture are harder to flatten neatly.
Can I press flowers from a bouquet I bought online?
Yes, absolutely. In fact, many people do this with anniversary, birthday, or wedding bouquets. If you're ordering flowers specifically with keepsake potential in mind, choose blooms that arrive fresh and are easy to handle.
Do I need a flower press, or is a book enough?
A heavy book is enough for most beginners. A flower press gives more even pressure and is useful if you plan to do this regularly. If it's your first try, a book is fine.
Why did my pressed flowers go brown?
Usually because they were too wet, pressed too slowly, or exposed to too much heat or light. Some flowers naturally change colour more than others, so a little browning is normal. A lot of browning usually means there was too much moisture.
Can I use pressed flowers in resin?
Yes, but they must be completely dry first. Any trapped moisture can cause cloudiness or mould. If you're new to the process, start with a flat frame before moving on to resin.
How do I keep the colours from fading?
Keep the finished piece away from direct sunlight and radiators. Use acid-free backing where possible and seal the item in a frame or protective mount. Even then, natural fading can happen over time.
Are some flowers too thick to press well?
Yes. Very bulky flowers often need to be split into smaller sections. Large blossoms with thick centres, like some lilies or roses in full bloom, can be harder to press than thinner flowers.
Can I make a keepsake from funeral or sympathy flowers?
Yes, many people do, provided it feels appropriate and everyone involved is comfortable with it. Choose a respectful design and handle the flowers gently. A simple frame or memory card often works well.
What's the best glue for pressed flower crafts?
Use a small amount of archival or craft adhesive that dries clear. Test it first on scrap paper. Too much glue can stain petals or make them look shiny and unnatural.
Can children make this project safely?
Yes, with supervision. Children can help choose flowers, arrange them, or place them in books. Adults should handle scissors, glue, and any sharp tools. Keep it simple and low-mess.
What is the easiest pressed flower keepsake to start with?
A simple framed flower arrangement or a card insert is usually the easiest. Both use fewer flowers, require less precision, and let you practise spacing before trying a more complex display.
Is it better to press flowers fresh or dried?
Fresh flowers usually give better results because they hold shape and colour more evenly. If flowers are already partly dried, you can still try, but the finish may be more fragile.
Can I use flowers from any occasion?
Yes. People commonly preserve flowers from weddings, birthdays, anniversaries, new baby celebrations, thank-you gifts, and memorials. The important part is choosing a format that suits the memory.